First you have to create a gallery.
- From your admin sidebar, open Galleries > Add New Gallery. You will get add new gallery form as below picture.
- Enter Gallery Title and Excerpt for example short description about the gallery then click “Publish”.
- Next you have to add images to this gallery. From gallery admin page. Click on “Upload Image” as below picture.
- Then select images you want to upload to this gallery. Once you finish upload each image. It will automatically attach to this gallery.
- You can also change image caption and description by clicking image from this page. If you want to change order of images within gallery. You can easily drag&drop image next to each one. Once you finish dragging, click “Update” to save changes.
- Look at “Gallery Options” select “Gallery Photo Proofing” as gallery template and save changes.
Gallery Comment

You can enable comment feature for photo proofing page. Look at “Discussion” box and check “Allow comments” option.
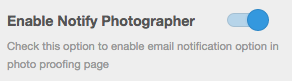
Notify Photographer
This functionality will let your client send notification email to your email address when they finished approved/rejected images in selected gallery.
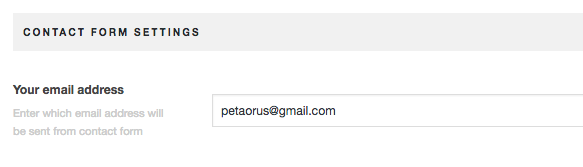
First you have to setup your email address in Theme Setting > General
Next go to Appearance > Customize > Gallery > General > Enable Notify Photographer option.
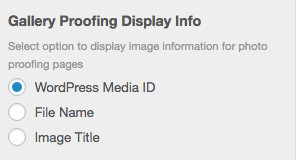
Display Photo Proofing Images Info
You can change image information displays in photo proofing gallery so your client can communicate with you easier. You can go to Appearance > Customize > Gallery > General > Gallery Proofing Display Info