Theme support WPML plugin for Multilingual content . First you have to purchase WPML license from https://wpml.org and your can download the plugin from your WPML account page (download WPML Multilingual CMS). Then install the plugin. From your admin sidebar, open Plugins > Add New > Upload. Then upload and install the plugin. Once you installed, activate it and it will be ready to use.
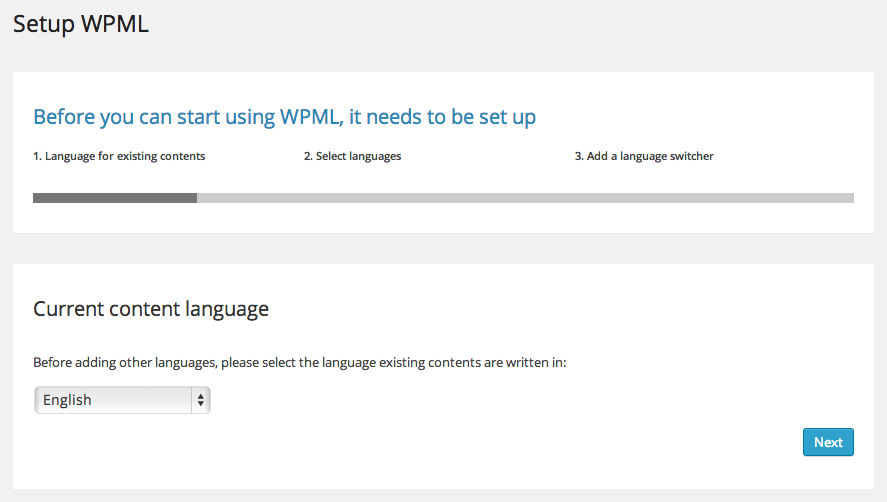
Now you will have WPML menu on the bottom left of WordPress Dashboard. The first step is to setup your current language.
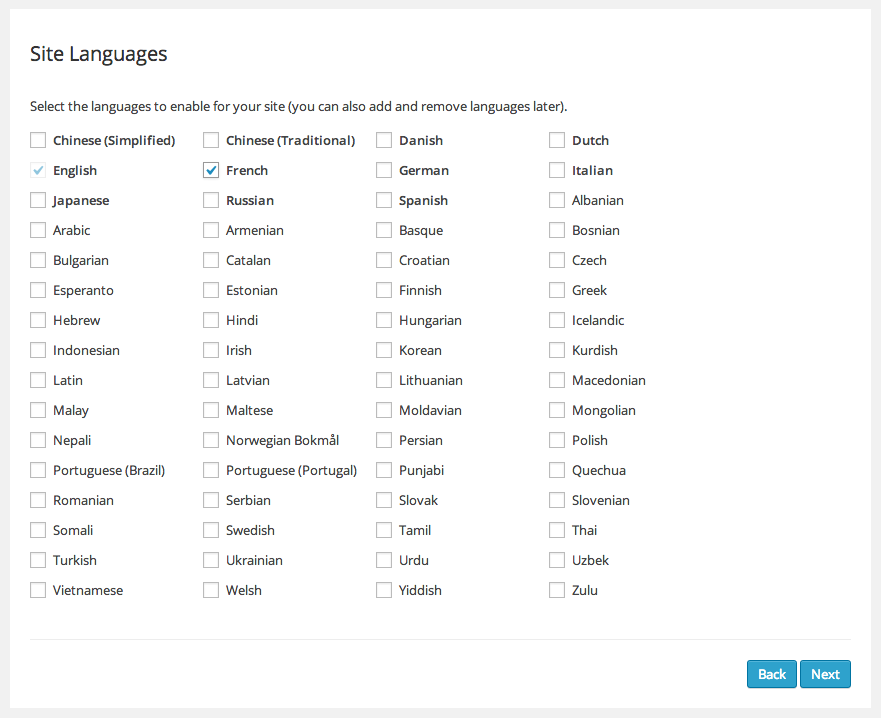
Next step. Select other languages you want to use on your site.
The last step is to add language switcher to your site. There are many ways to add it. You can select sidebar to display language switcher from the option “Choose where to display the language switcher widget”.
If you are familiar with PHP coding. You can also add custom language switcher using PHP code. Please see sample and tutorials here.
Another option is to add language switcher to your menu. Check “Display the language switcher in the WP Menu”. option and select your main menu.

Next, go to your WPML account > Downloads and download WPML String Translation plugin. Install the plugin. From your admin sidebar, open Plugins > Add New > Upload. Then upload and install the plugin. Once you installed, activate it and it will be ready to use.
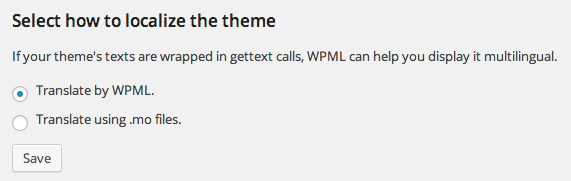
Open WPML > Theme and plugins localization and check “Translate by WPML.” and click Save button. Now WPML should added all translation strings to the system.

Open WPML > String Translation you will see list of all translation text. Click translations and enter translated text.
This is a basic step to translate theme strings into multiple languages. You can learn more about advanced options and other WPML features from WPML site.